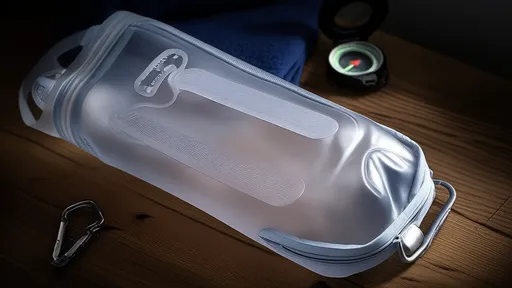
As hydration bladders become increasingly popular among outdoor enthusiasts, athletes, and daily commuters, their maintenance often remains an afterthought. These ingenious reservoirs have revolutionized how we carry and consume water during activities, but their complex internal structures create perfect breeding grounds for mold, bacteria, and unpleasant odors when neglected. The very features that make them convenient—the dark, moist interior and narrow tubing—present unique cleaning challenges that demand specialized attention and regular care.
Many users discover the importance of proper maintenance only after encountering the telltale signs of contamination: that distinct plastic taste evolving into something decidedly foul, visible specks of mold forming around the mouthpiece, or worse, experiencing stomach issues after drinking. The reality is that any hydration system, regardless of quality or price point, requires consistent cleaning to remain safe and functional. Neglecting this crucial aspect not only compromises your health but significantly shortens the lifespan of your equipment.
The cleaning process begins immediately after each use, starting with the most critical step: complete drainage. Never store your hydration bladder with water remaining inside, as stagnant water accelerates bacterial growth and degradation of the materials. After emptying, disassemble every component—bite valve, tube, and reservoir—according to the manufacturer's instructions. This thorough disassembly is non-negotiable for effective cleaning, as hidden moisture in connectors or under valve seals inevitably leads to mold colonization.
For daily maintenance, warm water with a small amount of mild soap proves sufficient for removing most residues. Use a specialized hydration bladder brush to scrub the interior surfaces, paying particular attention to corners and crevices where biofilm tends to accumulate. The drinking tube requires its own cleaning brush, ideally one with flexible bristles that can navigate the tube's entire length. The bite valve demands careful cleaning around the silicone slit, where bacteria from your mouth typically transfer during use.
Weekly deep cleaning sessions involve more powerful solutions to eliminate stubborn contaminants. A mixture of baking soda and vinegar creates an effective fizzing action that dislodges debris and neutralizes odors without harsh chemicals. For more persistent issues, specialized hydration cleaner tablets—effervescent formulas designed specifically for reservoir systems—provide professional-level sanitization. These tablets dissolve in water to create oxygen-based cleaning solutions that penetrate every component without leaving toxic residues.
The drying process proves equally crucial as cleaning itself. Moisture left inside any component inevitably leads to microbial growth. Hang the reservoir open-side down in a well-ventilated area, preferably with a gentle airflow. Use a drying rack specifically designed for hydration systems, or fashion your own method to keep the bladder open during drying. The tube should be hung straight to allow complete drainage, while the bite valve should be disassembled if possible and dried separately. Never store any component until you've confirmed it is completely dry internally—this single practice prevents most contamination issues.
Seasonal maintenance addresses wear and tear that occurs over time. Inspect the reservoir for punctures, leaks, or significant discoloration that might indicate material breakdown. Check the tube for stiffness or cracking, particularly near connection points. The bite valve should maintain its flexibility and seal properly—if it becomes loose or develops tears, replacement becomes necessary. Most manufacturers offer replacement parts, extending the life of your system through strategic component updates rather than full system replacement.
Storage conditions dramatically impact your hydration bladder's longevity. Avoid extreme temperatures—both heat that accelerates plastic degradation and cold that makes materials brittle. Store disassembled components in a cool, dry place away from direct sunlight. Some outdoor enthusiasts use the freezer for storage (after thorough drying), which prevents any microbial growth during extended periods between uses. However, this method requires careful thawing and inspection before next use to ensure no moisture condensation occurs inside components.
Recognizing when to replace your system constitutes an essential aspect of responsible ownership. Despite meticulous care, all hydration bladders eventually reach the end of their functional life. Persistent odors that survive multiple cleaning cycles indicate deep contamination that may compromise the material itself. Cloudiness in previously clear plastic often signals material breakdown, while frequent leaks despite proper closure suggest worn-out seams or fittings. Most quality hydration bladders provide two to three years of regular service with proper maintenance, though heavy use or exposure to harsh conditions may shorten this timeline.
The evolution of hydration bladder materials has significantly improved maintenance experiences. Modern antimicrobial treatments inhibit bacterial growth on interior surfaces, while taste-free materials prevent that plastic flavor many earlier users remember. Transparent materials allow visual inspection of interior conditions, and quick-disconnect fittings simplify the cleaning process. These advancements make maintenance considerably easier than in earlier generations of hydration systems, though they don't eliminate the need for regular care.
Developing consistent cleaning habits transforms maintenance from a chore into a quick, integrated part of your outdoor routine. Many experienced users establish cleaning rituals immediately upon returning from activities—while unpacking other gear, the hydration system gets cleaned alongside water bottles and cooking equipment. This habitual approach prevents the procrastination that leads to stubborn contamination issues. Keeping cleaning brushes and tablets with your outdoor gear ensures you always have the necessary tools available when needed.
Ultimately, proper hydration bladder maintenance represents both a practical necessity and an investment in your health and equipment longevity. The few minutes required after each use pale in comparison to the frustration of dealing with a contaminated system or the health risks of consuming compromised water. By implementing these cleaning and care practices, you ensure every sip from your hydration bladder remains refreshing, safe, and exactly what your body needs during physical exertion.

By /Aug 25, 2025

By /Aug 25, 2025

By /Aug 25, 2025

By /Aug 25, 2025

By /Aug 25, 2025

By /Aug 25, 2025

By /Aug 25, 2025

By /Aug 25, 2025

By /Aug 25, 2025

By /Aug 25, 2025

By /Aug 25, 2025

By /Aug 25, 2025

By /Aug 25, 2025

By /Aug 25, 2025

By /Aug 25, 2025

By /Aug 25, 2025

By /Aug 25, 2025

By /Aug 25, 2025

By /Aug 25, 2025

By /Aug 25, 2025